How many of you have always wanted chickens? Maybe those of you who live in urban or suburban areas here in the United States have never really considered keeping a small flock of fowl right on your own property. Stop and ask yourself whether you’ve never considered the idea because you don’t really want anything to do with chickens or because you thought it wasn’t possible where you live? If it’s the latter you can toss out the notion that keeping chickens in town isn’t possible. It is very possible and you can start raising your own poultry as soon as you’d like.
Chickens can provide:
Hormone-free and antibiotic-free eggs(a wonderful source of protein) that taste better and are healthier than store bought eggs
Fertilizer for the garden in the form of manure from composted kitchen scraps.
Pest control of insects and grubs.
An excellent source of healthy meat for your table.
Wonderful companions.
For several years I fondly looked forward to the day when I could move to a home outside of the city where I could do all the things I’ve want to do for so long. With more room I could garden, grow fruit trees, start a compost pile and yes, raise chickens. Then one day I discovered something most recently phrased quite eloquently.
“wherever we go, the city, the country, the moon, we take ourselves with us. there is no heaven. i used to fantasize about living in a healthier place, one where i could ride my bike, for example. then, one day, i started riding my bike. now, without having fled or escaped to anywhere, i live in a place where i can ride my bike.” –
heretic figAnd if he likes he can live in a place where he raises his own chickens. Chickens are incredibly easy to care for. I got my inspiration for raising urban chickens from Katy Skinner over at
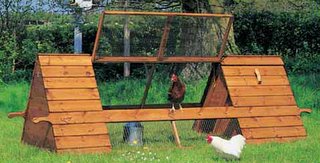
The City Chicken. She has put together a great site that not only answers most of the questions urban citizens might have concerning raising chickens in the city but she’s also got a gallery of chicken tractor photography that’s bound to inspire you to raise your own. This by the way is a chicken tractor, but we’ll get to housing in a bit.
First it’s necessary to understand hens and roosters. Aren’t chickens loud most people ask? The answer is that the boy chickens (Roosters) are loud. They crow, especially early in the morning and are sure to annoy neighbors close by. I would not suggest raising roosters. Many municipalities don’t allow it anyway. Girl chickens (Hens) don’t make much noise. They do coo and occasional squawk when they get excited or are chased but on average they make much less noise than a dog. Some municipalities have adopted standardized zoning regulations that don’t allow livestock of any kind to be raised inside of the city limits. There are three approaches to dealing with this fact of location. The first is to lobby for a change in the law. The second is to attempt to acquire a personal variance. The third is to respectfully approach your neighbors with your intentions and if there are no objections quietly set up your chickens. A small flock of 3 or 4 hens will probably go unnoticed even in urban areas.
The next question most people ask is about how I get eggs if I don’t have any roosters. The answer is that chickens lay eggs regardless of whether or not there is a male around to fertilize the egg. The vast majority of the eggs you purchase in at the grocery store are unfertilized. If given some thought most people prefer the idea of eating an unfertilized egg.
Housing for your flock can be accomplished by building a chicken tractor (or chicken ark in the UK) a mobile, bottomless cage system that works well for housing your chickens. This will contain and protect your chickens while providing them with a humane and even enjoyable home. Chickens need a minimum of about 2 square feet of covered area to protect them from the elements. If you want eggs it’s best to provide a nesting box for the chickens to lay eggs in. They will make their own nest in the absence of a box. They may even lay their eggs out in the open but I think they appreciate the box. Chickens need at least 8 square feet of outdoor area. Technically they can survive completely indoors. This is how they’re raised in commercial operations. But I think you will have happier chickens if they get a little running room. They love to scratch and strut. Even in an urban environment chickens do face threats in the form of predators. Neighborhood dogs, raptors and even raccoons. The chicken tractor helps to ensure their safety. And they come in all shapes and sizes.


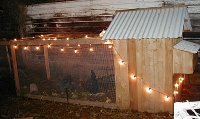
They even come in fashionable varieties.

Most people don’t realize chickens can fly. If you don’t provide them a home to sleep in at night they will often fly up into the safety of nearby trees. These trees may or may not be on your property. This could cause conflict with neighbors and is another reason to provide your chickens with a home. You can clip their wings to keep them grounded. This is accomplished by spreading one wing and cutting off the ends of the feathers. You don’t cut back very far so it doesn’t hurt the chicken. It just throws off the balance of flight and causes the chicken to crash if it tries to take to the air. Regardless of how permanent or how mobile you make you chicken housing structure it’s a good idea to provide the chickens their own abode.
You will need to provide your flock with a supply of water. The container will need to be cleaned periodically. A helpful hint is to tie the water container several inches above the ground. This will keep debris from flying into the water as the chickens scratch about. That means you’ll only have to scrub it when you change the water- once a week or so depending on the weather. I keep an old dish scrub brush next to the outdoor faucet for this purpose. You will also need to supply your chickens with food. Chickens will eat just about anything from your kitchen. They love table scraps and unlike dogs they prefer veggies. I feed them leftovers (they love spaghetti, think worms) and also any sort of grain or fruit I discard. Chickens are omnivores and will eat meat. I’ve watch them chase and eat crickets. They also love to scratch for grubs and bugs. They’re a great addition to the pest control division of my garden. I do refrain from feeding them leftover chicken. I bet they’d eat it but it just doesn’t seem right. I do mix their table scraps with feed I purchase from a farm supply store especially in the winter. I mix it myself to include chicken pellet feed, scratch grains and a small amount of crushed oyster shells. Sometimes I put it in a food container designed for chickens. Often though I just spread it on the ground in their outdoor area. They seem to enjoy scratching through their food.
All in all they work well as an excellent way to rapidly compost the organic material coming out of my kitchen. The manure the chickens generate is excellent fertilizer for the garden. Chicken droppings must be composted before they are used in the garden. If not they’ll burn the plants. I accomplish this by using a layer of leaves collected in the fall to line the interior of their structure’s outdoor area or chicken run. During the fall, winter and early spring I leave the chicken tractor in roughly the same spot. Every so often I rake up all the leaves, chicken poop and loose soil from the chicken run. I pile this material in a sunny spot and let it compost, replacing the layer of leaves in the chicken tractor. By time I’m ready to plant my garden I‘ve got excellent compost.
I do let the chickens roam loose in the backyard when I’m around, especially in the warmer months when there’s plenty of grass and insects for them to eat. During this time of year they mainly feed themselves during their “pasture time”. I do have a fence that encloses most but not all of my property. We do get the occasional animal that wanders into the area but the chickens are quick to run to their home at the first sign of danger and I seldom leave them to wander if I’m not close by. Rarely do I find the chickens venturing more than 100 feet from their home. As it gets dark I don’t even have to round them up. They make their way back to their tractor all on their own.
Chickens do need protection in the form of shade from hot summer days. The amount you provide will depend on your climate. Likewise you will need to provide a heat source in the winter if you live in a cold region of the globe. Chickens do fine down to the freezing point. At that temperature they can experience frost bite. My rule of thumb is to supply heat in the form of a light bulb to ensure the interior of their home never falls below 40 degrees Fahrenheit. The light seems to help promote winter season egg laying.
Chickens will begin laying eggs 4 and 8 months after hatching depending on the breed. During the first year of egg laying the chickens will be most prolific, laying almost one egg per day in prime circumstances. This does depend again on the breed. There are many different types of chickens. Do some investigating to determine which you would like to raise. There are even dwarf chickens or bantams that are smaller and therefore more appropriate for undersized backyards.
I must mention the Avian bird flu. It has not shown up in migratory birds here in North America. The virus spreads from wild fowl to domestic birds through interaction and then spreads to humans through direct contact. IT CAN BE EASILY AVOIDED by not allowing your birds to come into contact with wild, migratory birds. For most urban or suburban dwellers this is easy to do. I have never had a flock of wild geese land in my yard. The chicken tractor would ensure that the already unlikely contact between my birds and wild fowl doesn’t occur. The second layer of precaution is proper handling of the birds. Recently children in the country Turkey were infected with Avian flu after playing with severed chicken heads. This is not a good idea. In fact it’s smart not to handle your birds very often and to always wash your hands thoroughly after contact with them. The chances of getting sick because you raise chickens are minuscule. Most of what is covered in the mass media is fear mongering but you probably know that already.
I don’t cover the butchering of chickens to provide a meat source because I am a vegetarian and don’t have any experience in the matter. The resources provided at the end of this post will make available that information.
To end on a lighter note I’d like to briefly discuss brooding chicks. This is an exciting experience as you bring home your baby chicks and care for them until they’re ready to live outdoors in the home you provide. Spring is a good time of year to acquire your chicks as they are extra susceptible to cold until they grow fully formed feathers. You can inquire locally at farm supply stores. Some will sell chicks usually around Easter. If not they may know of local sources maybe even local farmers who will sell or trade for chicks. You can also buy them from hatcheries by mail order. The biggest problems will be the minimum purchase most companies require. Most backyard chicken owners don’t need 30 chickens! Persistence will award you with a reliable source. Many suppliers will be unable to tell you if you are purchasing hens or roosters. If this is the case you should plan on 50% of each. Make plans ahead of time on how you will humanely handle your roosters if you can not keep them. Often you may find people further out of town willing to adopt your roosters. Try
Freecycle for giving them away as well. Before you get your little darlings home you’ll want to have their temporary home set up. You’ll need to get a container, the large Tupperware type works well. Use newspaper as a lining. This will allow you to clean up droppings easily. Some people have mentioned problems with wet newspaper sticking to the chicks but I haven’t had this problem. Next you’ll need a light bulb that you can adjust so it hangs lower or higher. A stronger bulb works better and have a spare on hand. You’ll need a container for food and a container for water. You can purchase metal containers for each purpose that screw on to regular mason jars. These work best at keeping the chicks and chick poop out of food and water. You can as always improvise. Special chick food can be purchased from your chick supplier, a feed store or online. While you’re buying get some chick grit. This will supply the chicks with the small stones they need to aid in digestion. Bring the chicks home as soon as possible if shipped by mail. Adjust the height of the bulb, their heat source. If it’s too low the chicks will get hot and move away from the bulb. If it’s too high the chicks will get cold and cheeep (complain) from underneath the bulb. You should start at 90 degree Fahrenheit and decrease the temperature by 5 degrees each week. The chicks will let you know (cheeep cheeep!) if you mess up. After about 6 weeks they’ll have most of their feather (depending on breed) and can be moved to an outdoor home depending on the weather and how weatherproof you’ve built their permanent home. A final note, be sure to check the chicks for poop build up on their underside. They can “paste up” and block waste removal. This can cause obvious problems.

baby Ubie
All in all I think those willing to try raising backyard chickens will be please with the experience. What a wonderful way to provide food for yourself, fertilizer for you garden, pest control for your yard and to enjoy the company of intelligent and amusing creatures.
Best of luck.
The City Chicken
Chicken Encyclopdeia
Mad City Chickens
The Urban Chicken
Organic Living The Urban Chicken Part Three
Backyard Chickens
McMurray Hatchery
Brown Egg Blue Egg List of Hatcheries
Show Your Pride Urban Chicken Farmers!


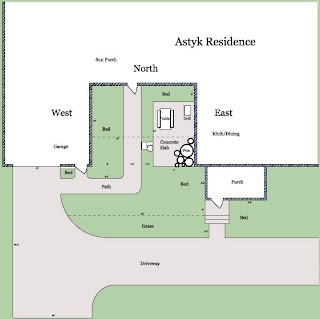
 The backyard is heavily shaded and therefore is used as a place to keep chickens in my hot climate and a place to store equipment. I also compost and have a pair of worm bins. My family also uses the backyard as a place to relax, recreate and even cook. The side yard has fruit trees in various stages of production- hopefully the apples trees will bear next year, the peach trees have been bearing for three years. The red maple tree will eventually be removed as the fruit trees get larger.

 This small, stainless steel can sits in front of my general trash can. It includes a removable bucket I carry out to the compost pile. It has a lid that stays closed until I step on the pedal allowing me to dump in my scraps without touching anything. It’s small enough to hold several days’ worth of kitchen scraps and it contains any odors.


 Worms. You can use worms to eat your leftover food and quickly turn it into worm castings, a wonderful compost for your garden. The practice is called


